TABLE OF CONTENTS
2. How to Launch Desktop Scraper
3. Scraping Desktop Application
1. Overview
You can capture all UI elements and XPaths present on a desktop application page using Desktop algoScraper Tool.
Make sure you have installed Desktop algoScraper tool. If not, refer to Installation steps for algoScraper.
2. How to Launch Desktop Scraper
How to Launch Desktop algoScraper
Perform the following:
- After installing the Desktop algoScraper tool, launch it by double-clicking the desktop application icon. Alternatively, you can launch AlgoScraper while creating a new Desktop Automation project in AlgoQA.
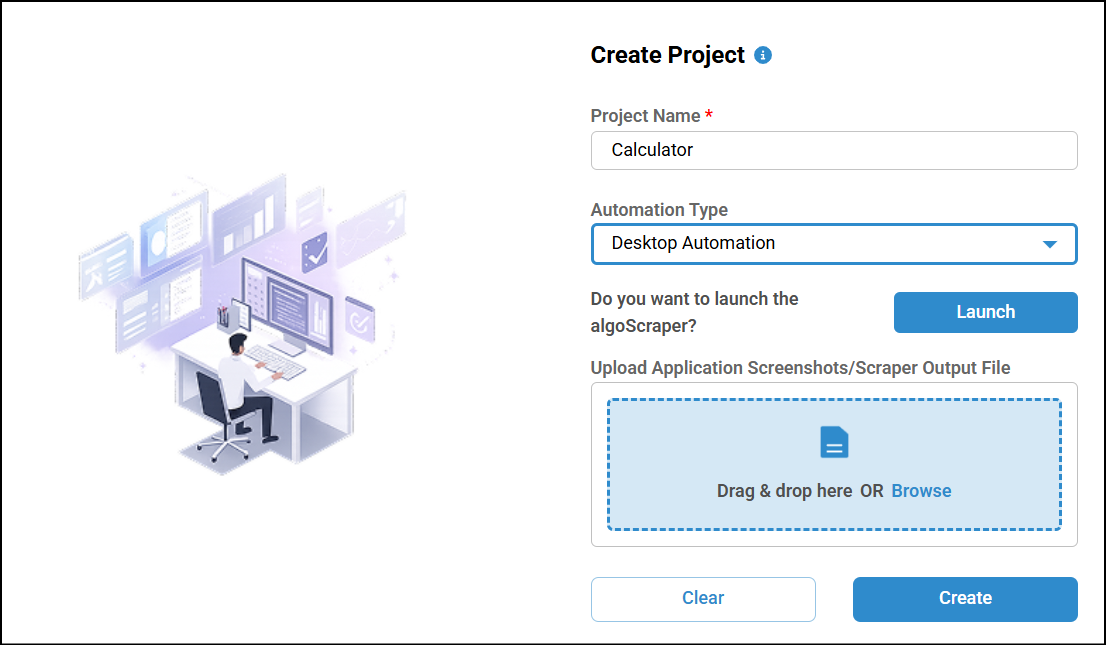
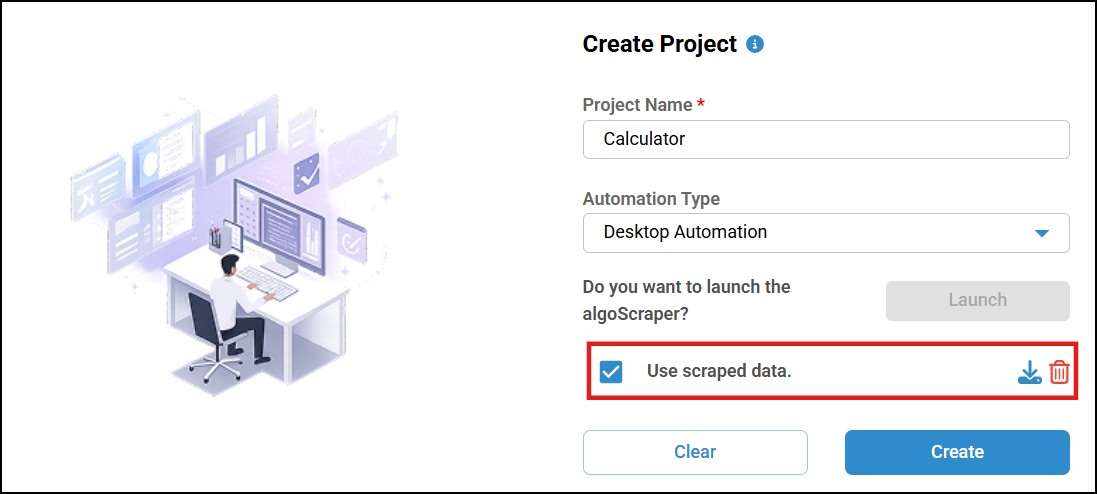
- Navigate to the Create Project page by clicking the + icon on the Projects page. Enter the project name, select Desktop Automation as the automation type, and click the Launch button next to Do you want to launch AlgoScraper? to launch the Desktop Scraper.
- A pop-up appears asking for permission to open the Desktop Scraper application. Click Open to launch the Desktop Scraper.
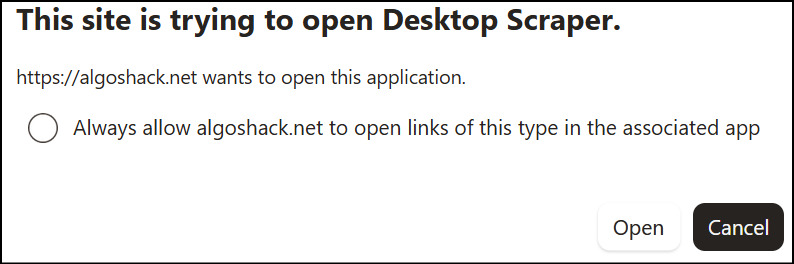
Note: To avoid this prompt in the future, select Always allow algoshack.net to open links of this type in the associated app before clicking Open.
3. Scraping Desktop Application
The Desktop Scraper screen appears. Click the Select Application button to choose the target application. Ensure that the application to be scraped is maximized. After clicking Select Application, click the target application within 3 seconds. The scraper window will reappear with the selected application. Enter the page name in the Screen Name field.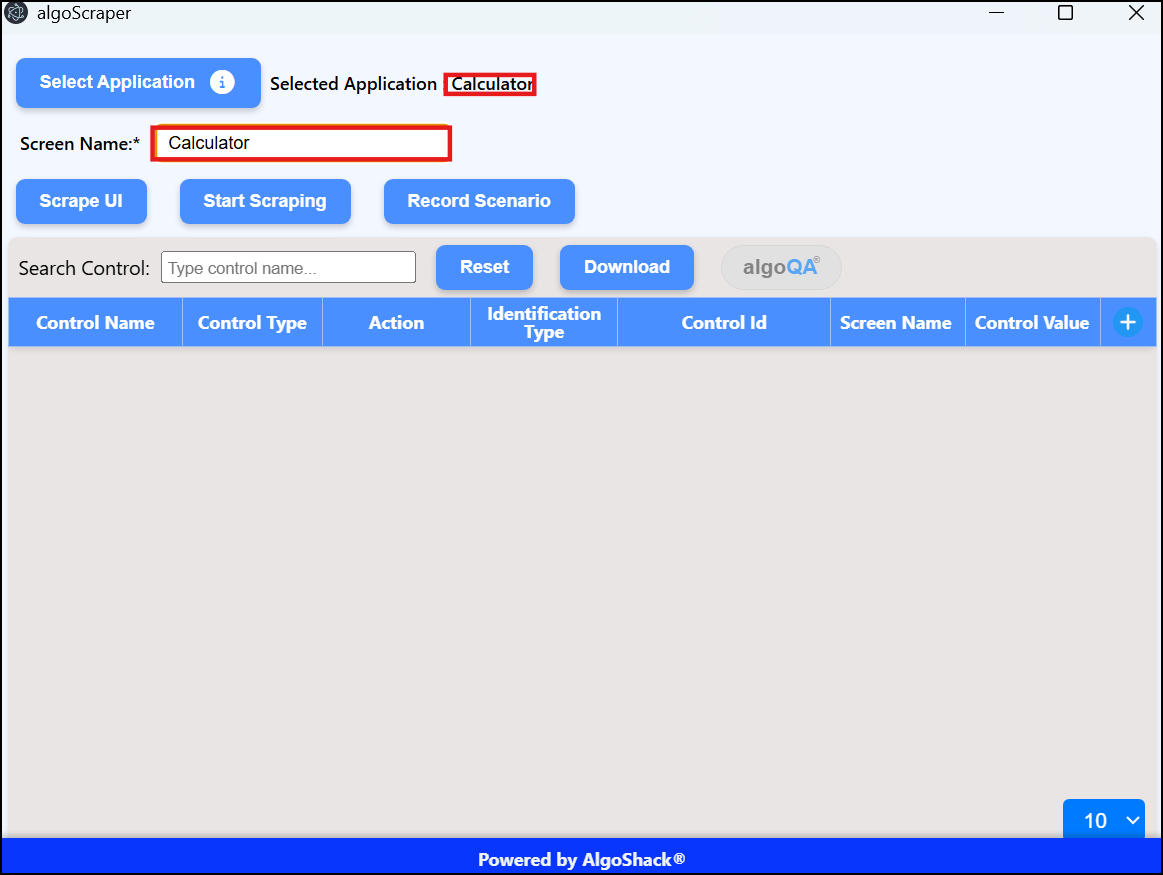
The scraper provides the following options:
Scrape UI – Scrapes all UI elements on the selected screen at once.
Start Scraping – Scrapes UI elements one by one.
Record Scenario – Records a scenario based on the actions you perform on the application.
3.1. Scrape UI
- Click the Scrape UI button to capture all UI elements. The details of the scraped UI elements, along with their corresponding expressions, are displayed in the scraped list.
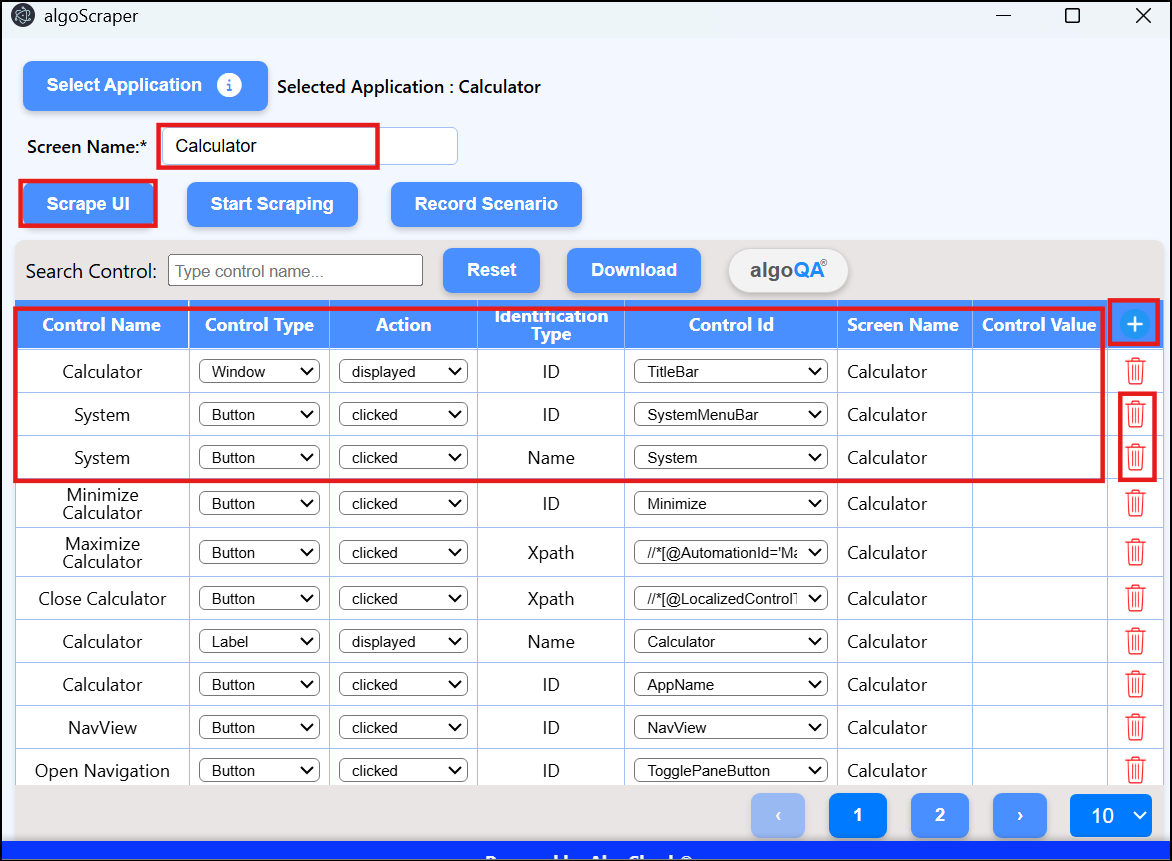
- The scraped list displays details such as the Control Name, Control Type, Action, Identification Type, Control ID, Screen Name, and Control Value for each scraped UI element.
- You can edit the Control Name, Control Type, Action, Identification Type, Control ID, and Screen Name for each scraped UI element.
Note: Currently, the supported identification types are XPath, Name, and ID. - To add a new step, click the + icon in the last column. Ensure all the required details for the current step are completed before adding the next step.
- You can delete a step by clicking the Delete icon in the corresponding row.
- To scrape another page, enter a new page name in the Screen Name field and click Scrape UI. The UI elements from the new page are scraped and appended below the previously scraped page in the scraped list.
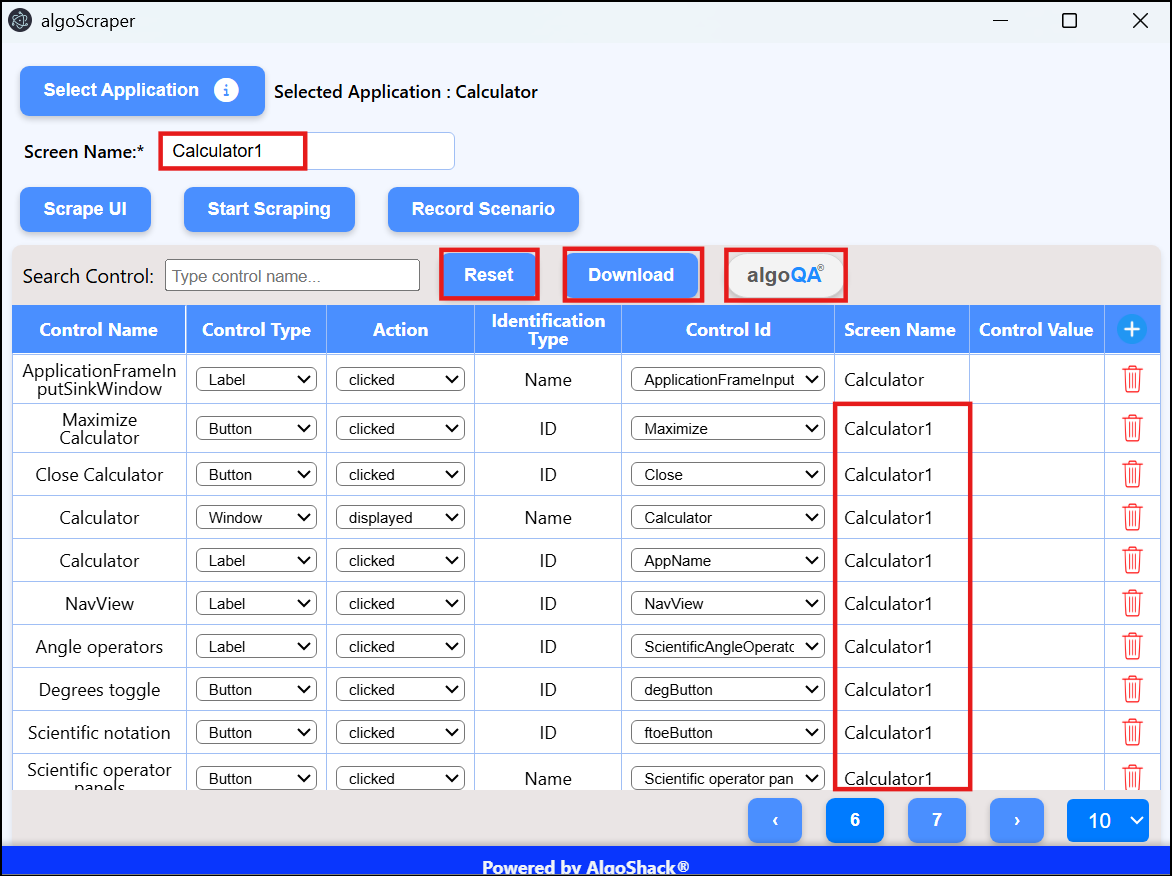
- You can search for a specific control by entering its name in the Search Control box. All matching controls are displayed in the scraped list.
- Click the Download button to download the scraped data as a JSON file. You can then upload the JSON file to AlgoQA to generate test scenarios.
- Click the algoQA icon to return to the Create Project page. The scraped JSON file is automatically attached, allowing you to proceed with generating test scenarios.
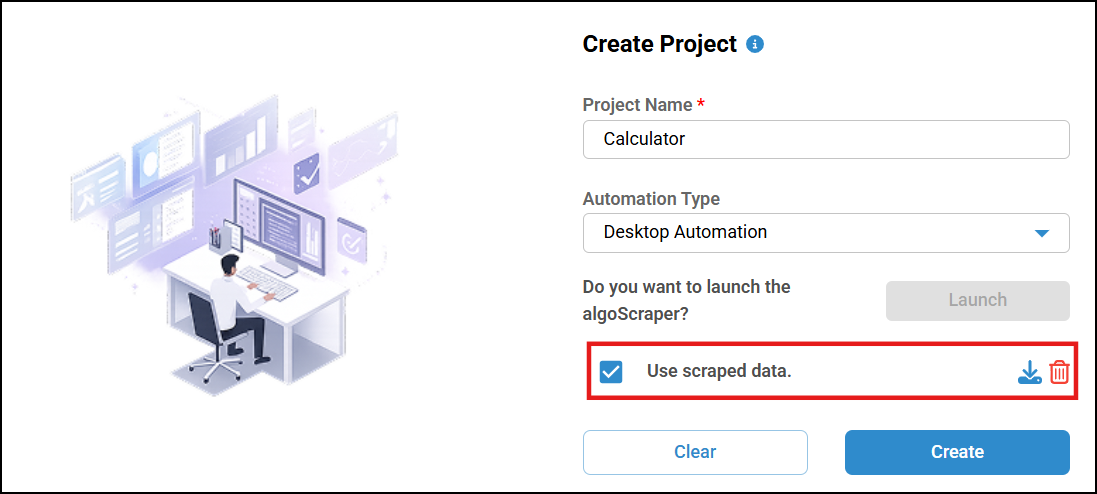
- After downloading the scraped file, click Reset to restore the default settings, or click Close to exit the Desktop Scraper application.
3.2. Start Scraping
- If you want to scrape UI elements individually, enter the page name in the Screen Name field and click Start Scraping.
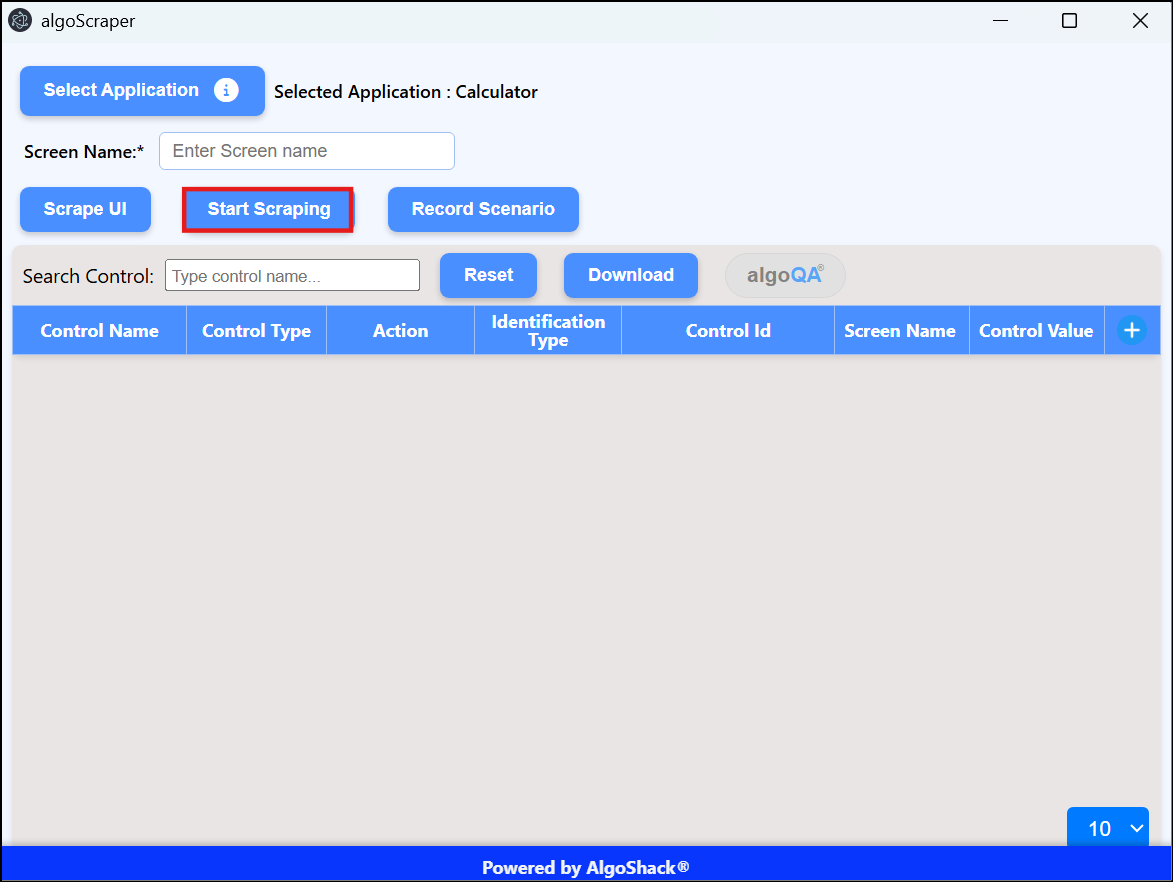
- A pop-up appears indicating that scraping has started. Click the UI elements you want to scrape in the target application..
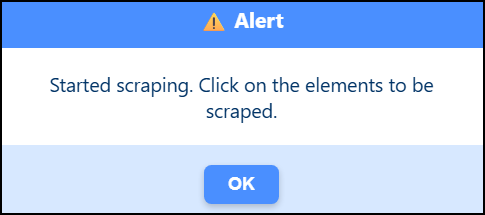
- Navigate to the target desktop application and click each UI element to capture its corresponding expression.
Note: As you click each UI element, it is highlighted in red to indicate that it has been selected for scraping. - Once you have finished scraping all the required UI elements, click Stop Scraping to end the scraping session.
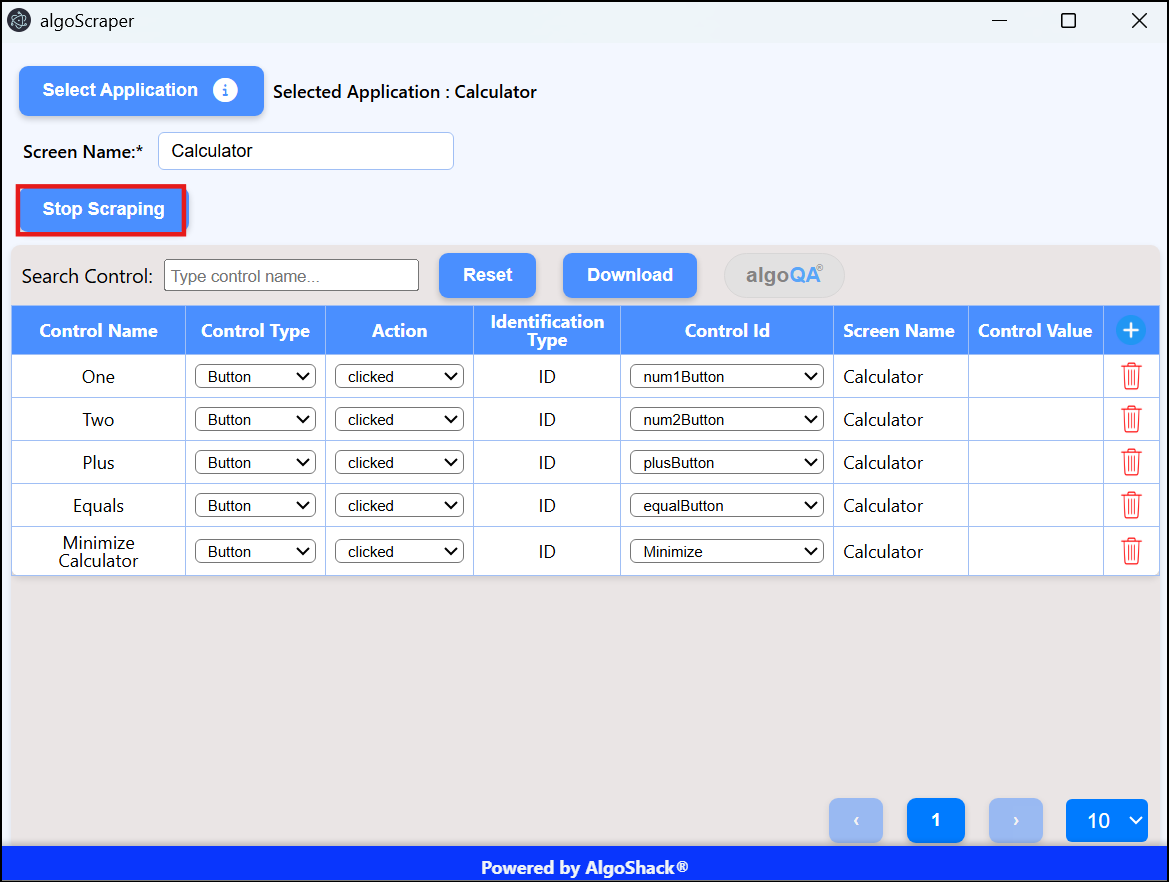
- The scraped list displays details such as the Control Name, Control Type, Action, Identification Type, Control ID, Screen Name, and Control Value for each scraped UI element.
- You can edit the Control Name, Control Type, Action, Identification Type, Control ID, and Screen Name for each scraped UI element.
Note: Currently, the supported identification types are XPath, Name, and ID. - To add a new step manually, click the + icon in the last column. Ensure all the required details for the current step are completed before adding the next step.
- You can delete a step by clicking the Delete icon in the corresponding row.
- To scrape another page, enter a new page name in the Screen Name field and click Start Scraping. Scrape the elements by elements and click stop scraping after scraping. The UI elements from the new page are scraped and appended below the previously scraped page in the scraped list.
- You can search for a specific control by entering its name in the Search Control box. All matching controls are displayed in the scraped list.
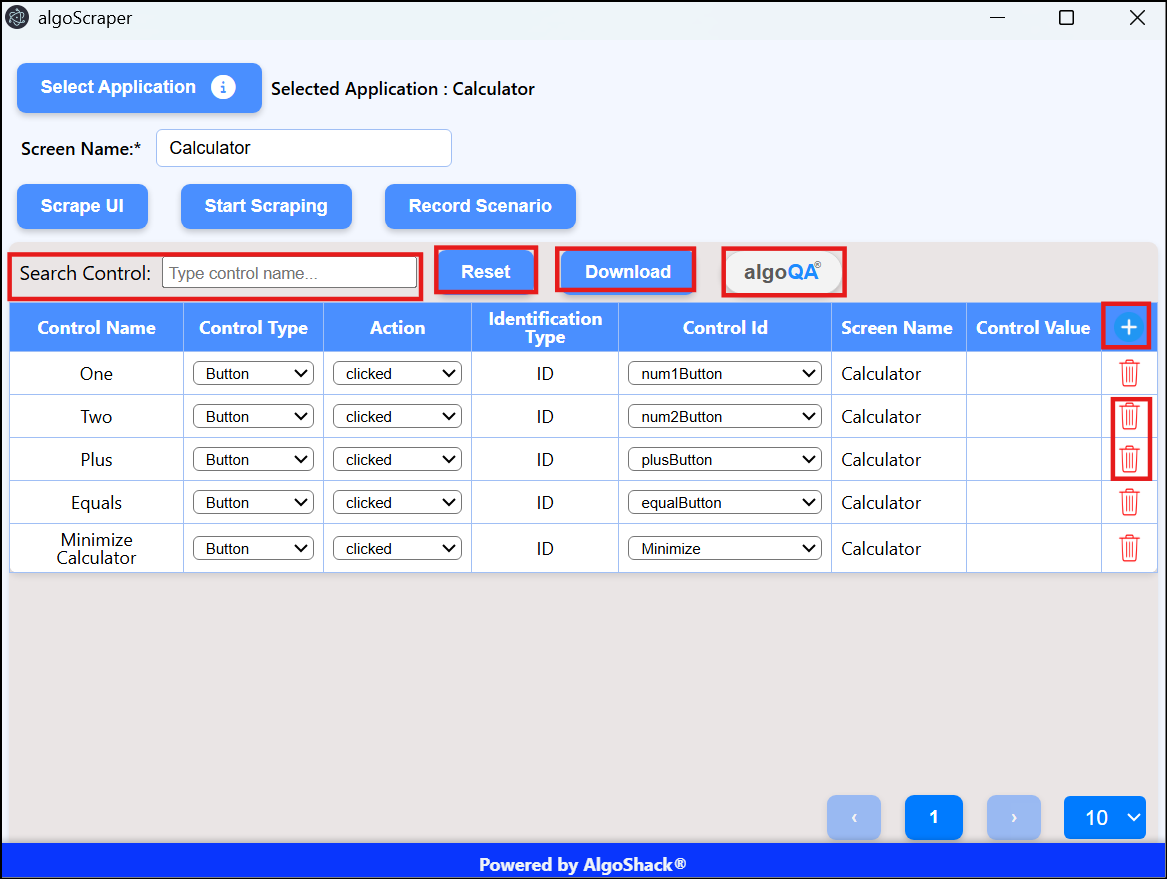
- Click the Download button to download the scraped data as a JSON file. You can then upload the JSON file to algoQA to generate test scenarios.
- Click the algoQA icon to return to the Create Project page. The scraped JSON file is automatically attached, allowing you to proceed with generating test scenarios.
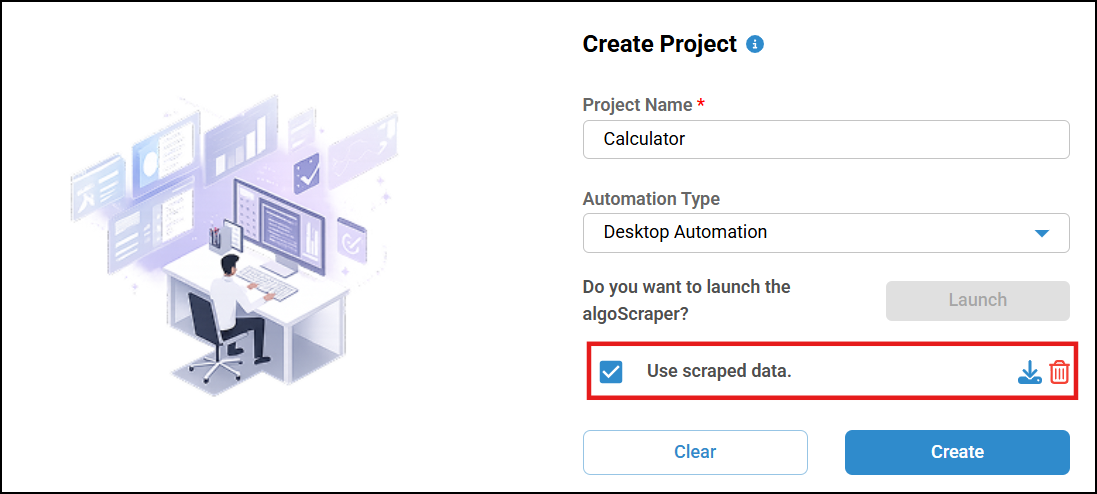
- After downloading the scraped file, click Reset to restore the default settings, or click Close to exit the Desktop Scraper application.
3.3. Record Scenario
- The Record Scenario feature in the Desktop AlgoScraper allows you to capture and record your interactions with a desktop application in real time, generating a test scenario based on the actions you perform.
- Enter the page name in the Screen Name field, then click Record Scenario to begin recording your interactions.
- Enter the Scenario Name and Scenario Outline. The Scenario Outline field is mandatory. After entering the required details, click Start Recording to begin recording the scenario.
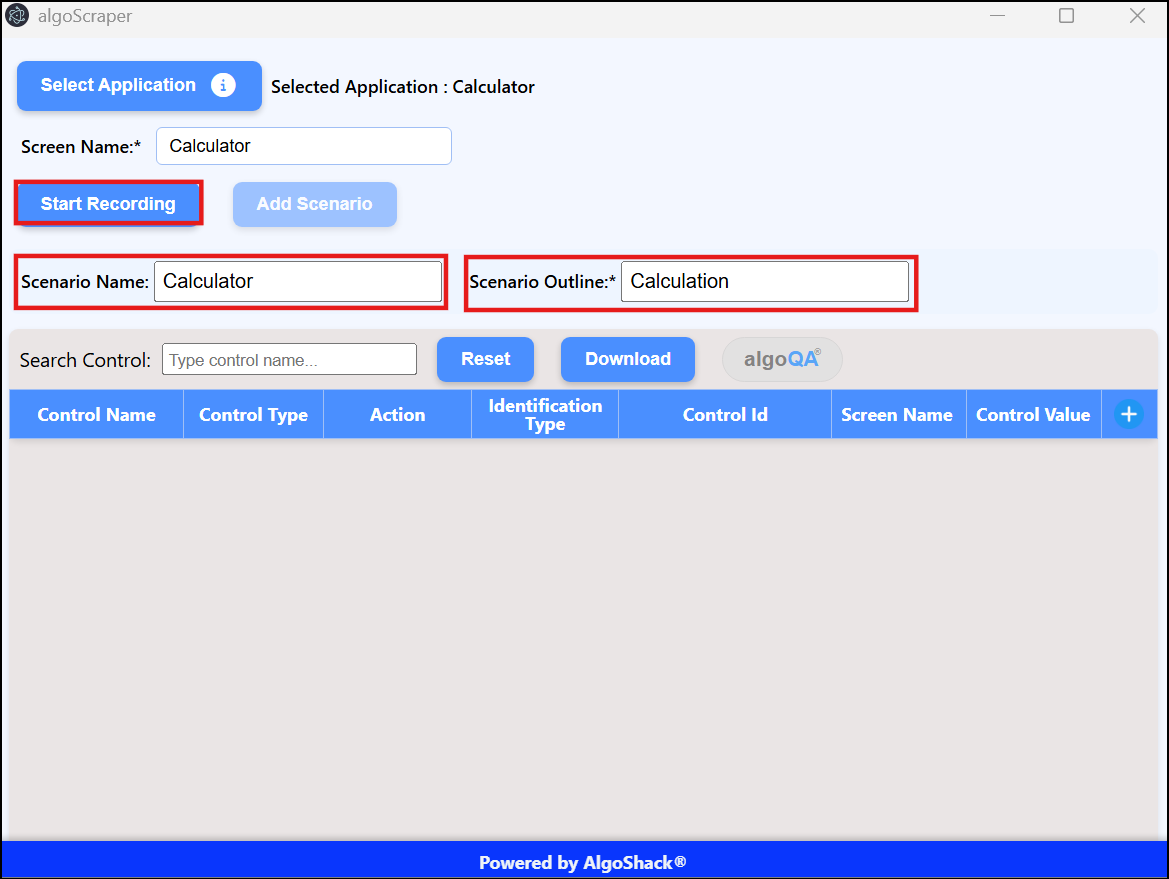
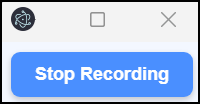
- The Desktop Scraper is minimized automatically. Perform the actions you want to record in the target application. Once you have completed the recording, return to the click Stop Recording.
- The recorded list displays details such as the Control Name, Control Type, Action, Identification Type, Control ID, Screen Name, and Control Value for each recorded step.
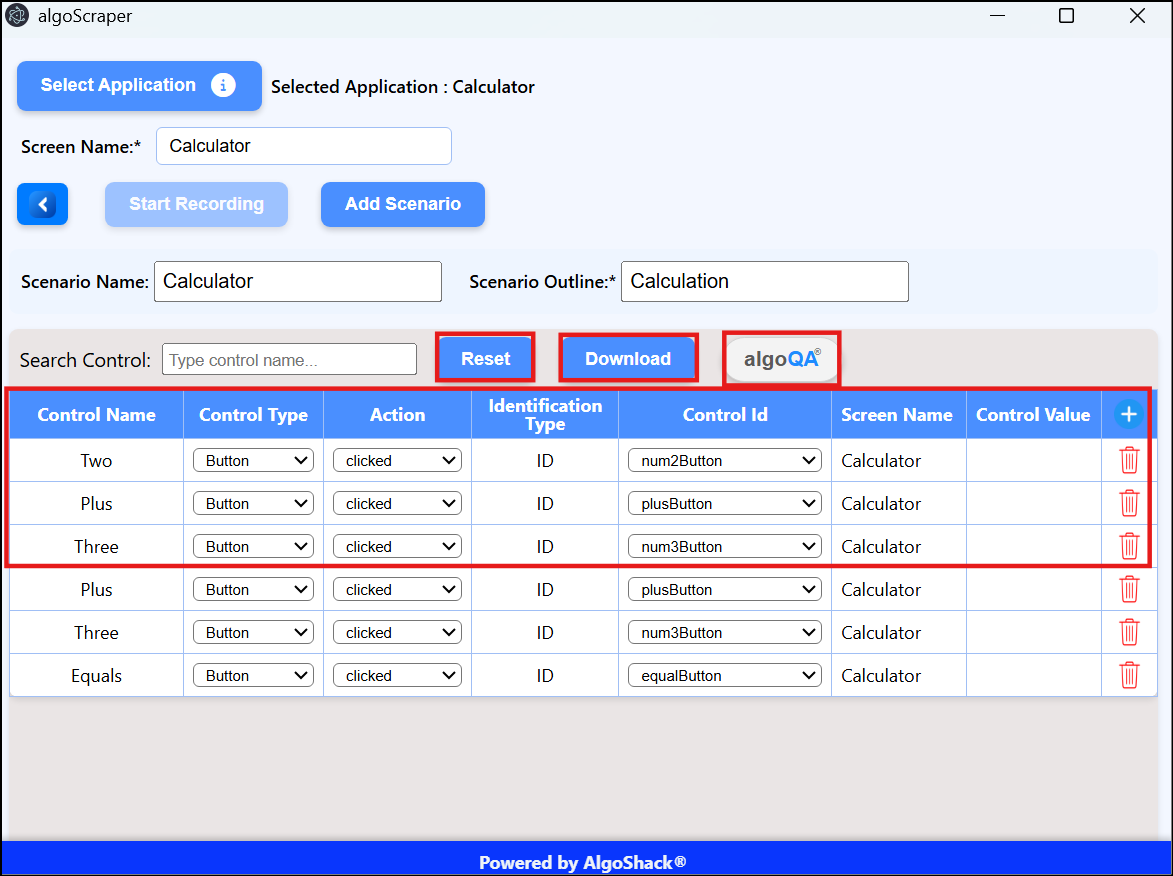
- You can edit the Control Name, Control Type, Action, Identification Type, Control ID, and Screen Name for each scraped UI element.
Note: Currently, the supported identification types are XPath, Name, and ID. - You can delete a step by clicking the Delete icon in the corresponding row.
- You can search for a specific control by entering its name in the Search Control box. All matching controls are displayed in the scraped list.
- You can record another scenario by clicking on Add scenario.
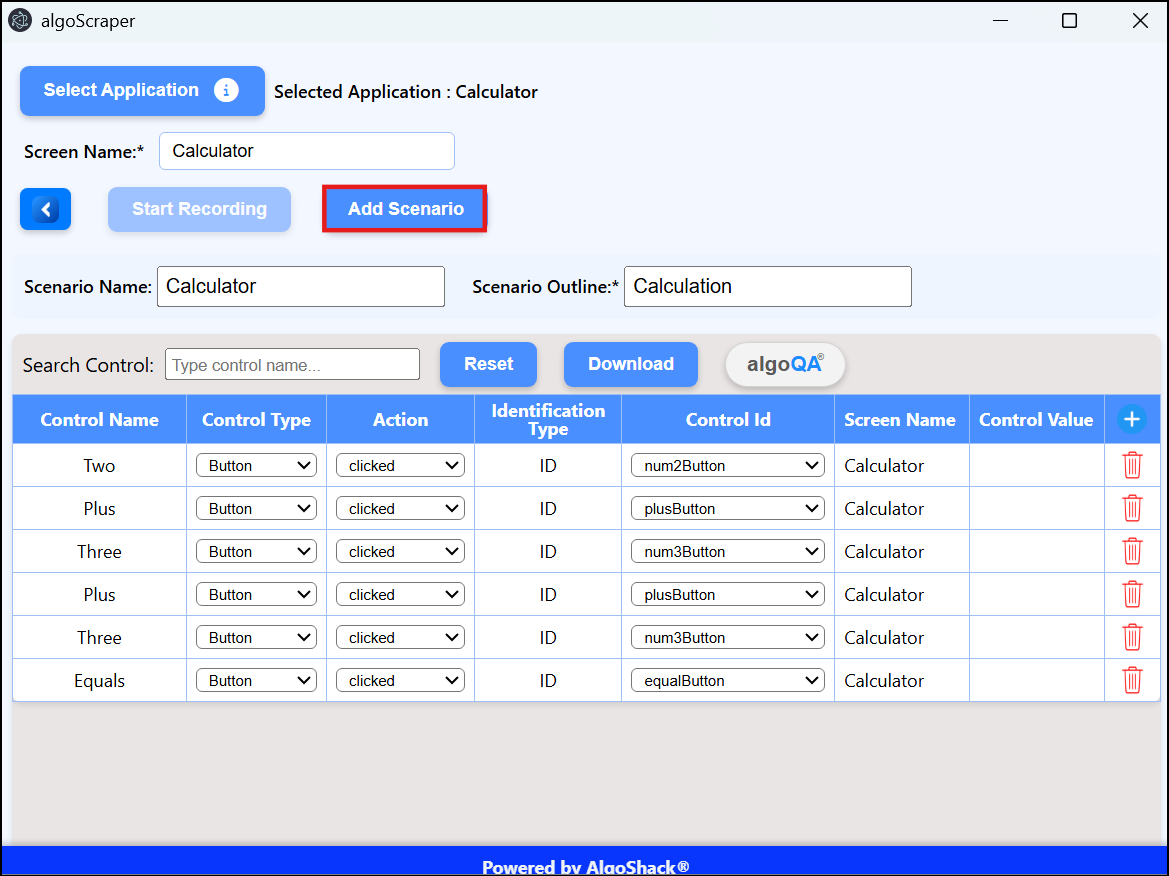
- The scenario will be saved and click on start recording to record next scenario.
- Click the Download button to download the scraped data as a JSON file. You can then upload the JSON file to algoQA to generate test scenarios.
- Click the algoQA icon to return to the Create Project page. The scraped JSON file is automatically attached, allowing you to proceed with generating test scenarios.
- After downloading the scraped file, click Reset to restore the default settings, or click Close to exit the Desktop Scraper application.
Was this article helpful?
That’s Great!
Thank you for your feedback
Sorry! We couldn't be helpful
Thank you for your feedback
Feedback sent
We appreciate your effort and will try to fix the article