TABLE OF CONTENTS
2. Create an Offline Model Using an Image
2.1 Step 1: Create a New Project
2.2 Step 2: Upload Additional Images
2.3 Step 3: Offline Model Creation
2.4 Step 4: Navigate to Test Design
2.6 Step 6: Generate Scenarios
2.7 Step 7: Review Generated Scenarios
2.8 Step 8: Generate Test Cases and Test Scripts
1. Overview
This article explains how to generate test scripts from images using algoQA.
Users can upload screenshots of the application pages either while creating the project or after the project has been created.
Using the uploaded screenshots, an offline model can be created. The offline model consists of nodes, features, and controls associated with the specific page under testing.
2. Create an Offline Model Using an Image
Follow the steps below to create an offline model and generate test scripts from images.
2.1 Step 1: Create a New Project
1. Start by creating a new project.
2. Enter the Project Name.
3. Select the Automation Type.
4. Browse and attach the image in the Upload Application Screenshots/Scraper Output File.
Note: You can upload multiple screenshots at a time.
5. Click Create.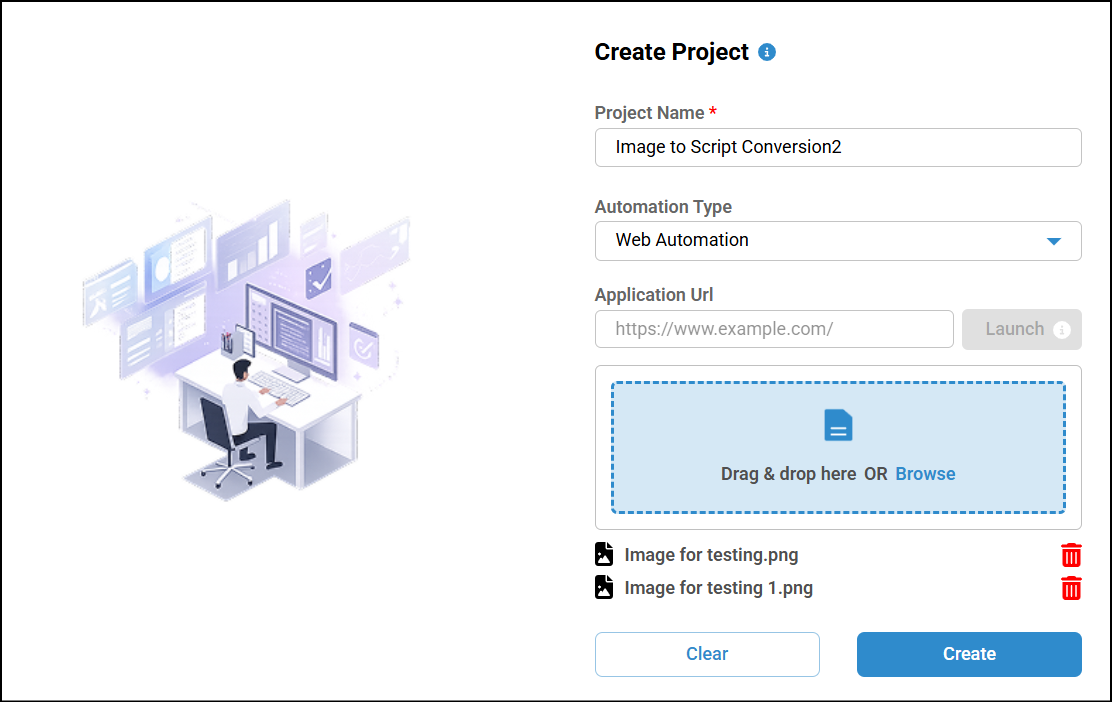
Once the project is created, a node configuration will be generated.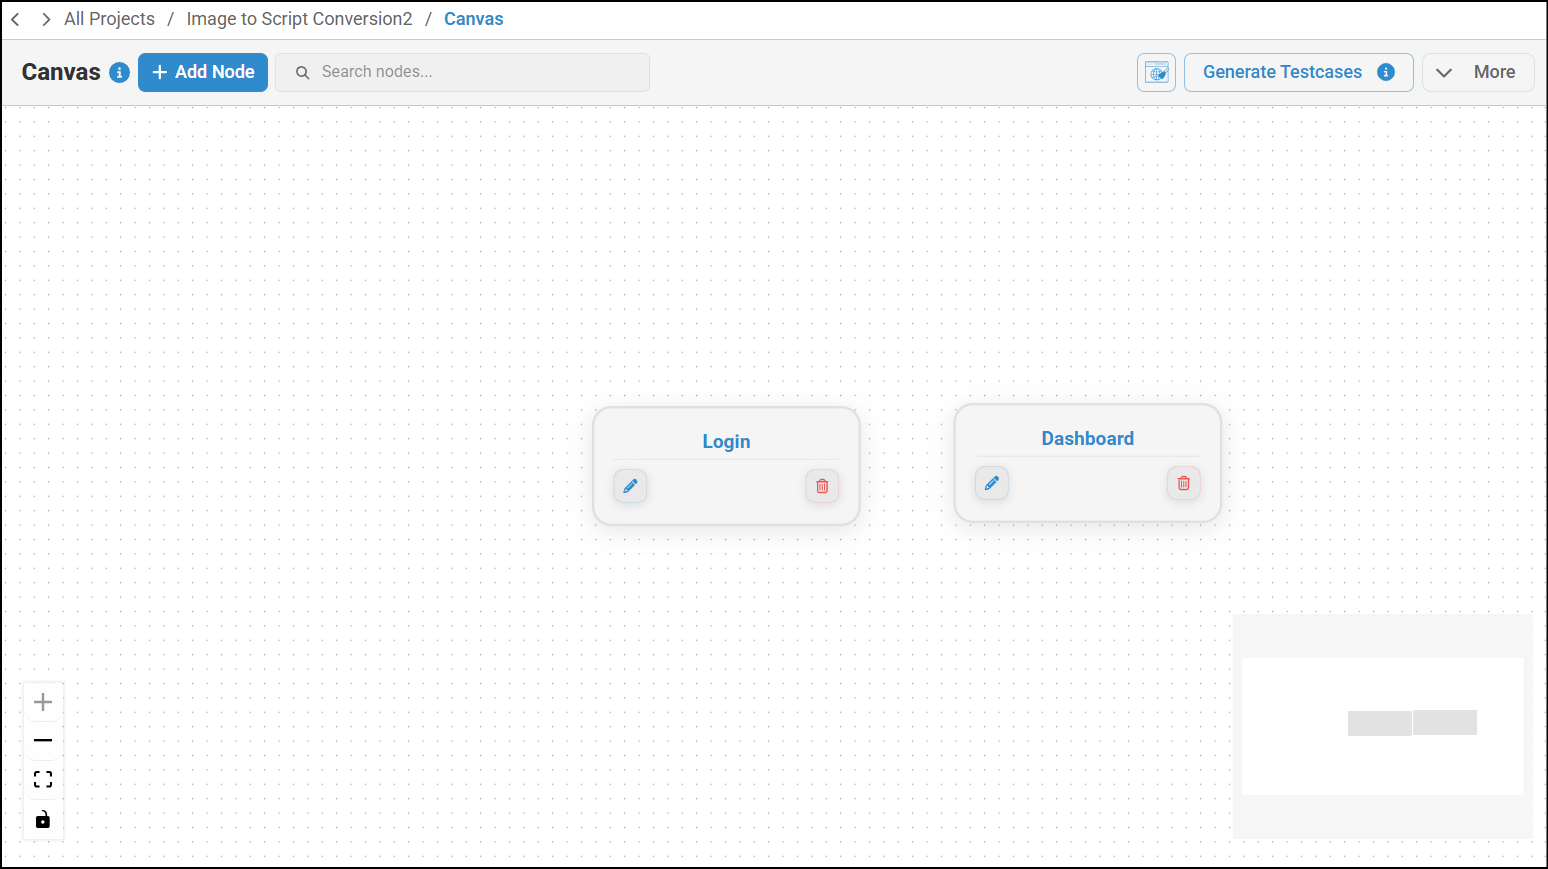
2.2 Step 2: Upload Additional Images
You can upload additional images or replace existing images if required.
1. Navigate to the canvas.
2. Click the More dropdown.
3. Select Upload Application Screenshot.
4. Upload the additional image.
Note: Select Replace Existing Configuration check box to replace existing configuration.
A new configuration will be added for the uploaded image.
2.3 Step 3: Offline Model Creation
After uploading the required images, the offline model will be ready for use.
2.4 Step 4: Navigate to Test Design
1. Go to the Test Design section.
2. Select the required node.
Note: Values will also be added for the controls, where applicable.
3. Click on Prompting.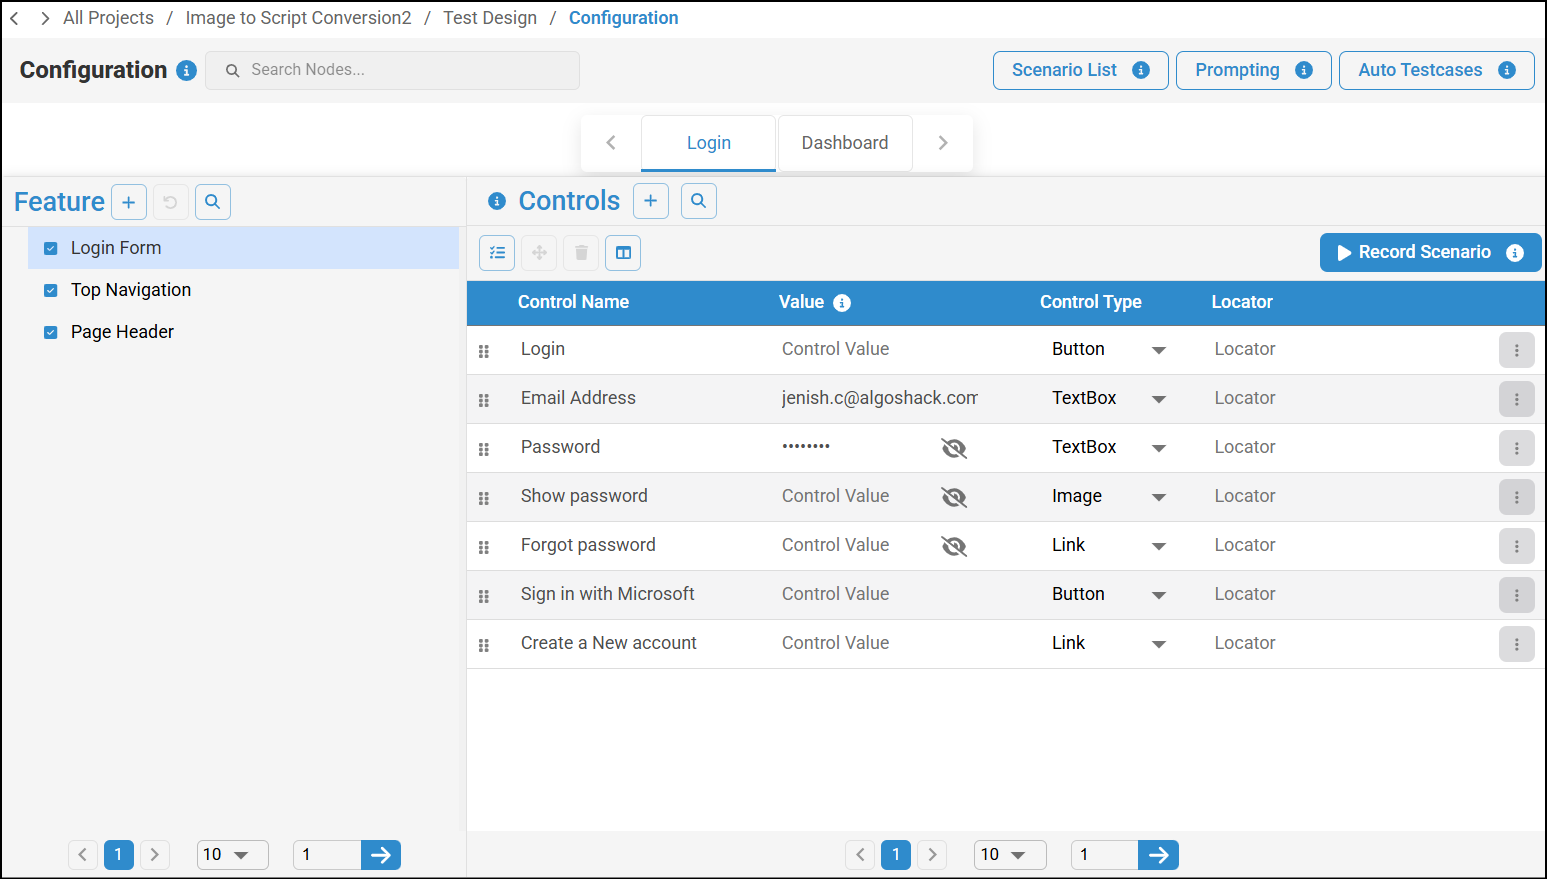
2.5 Step 5: Enter Prompt
Enter the prompt based on the uploaded image and the required test scenario.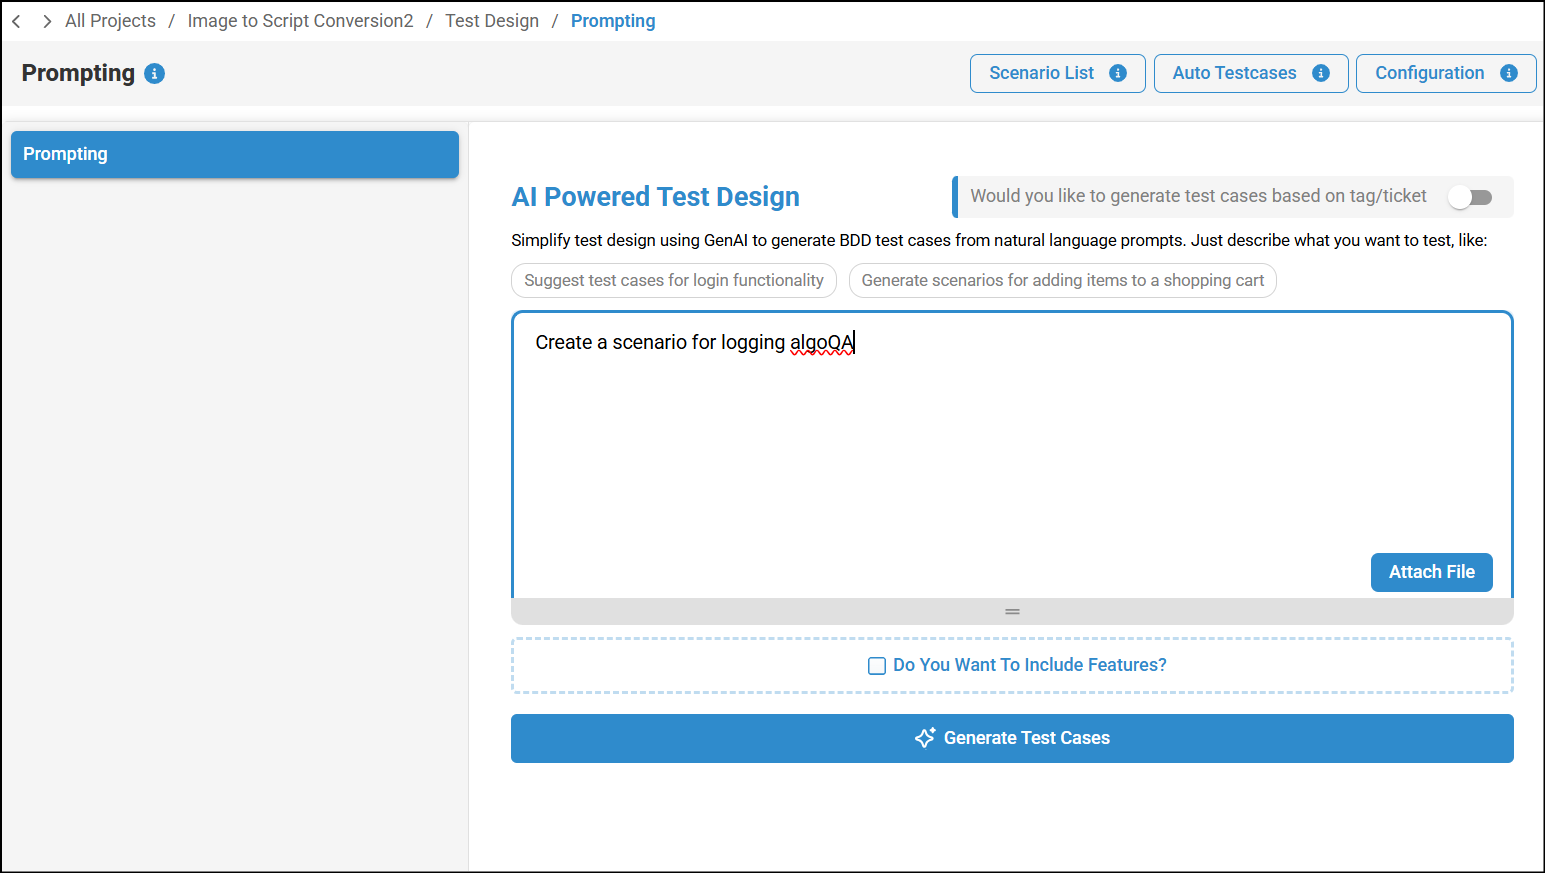
2.6 Step 6: Generate Scenarios
- Click on Generate Test Cases.
- The scenarios will be generated.
2.7 Step 7: Review Generated Scenarios
1. Click on View Scenario to review the generated scenarios.
2. Verify and make changes if required.
2.8 Step 8: Generate Test Cases and Test Scripts
After reviewing the scenarios, click on Generate Test Cases to generate test cases.
The test cases will be generated.
To know more on generating test cases and test scripts, refer Generate Test Cases and Test Scripts.
3. Limitations
- User will not receive the XPath directly — it must be added manually.
- To reduce noise, not all label elements are being captured.
Was this article helpful?
That’s Great!
Thank you for your feedback
Sorry! We couldn't be helpful
Thank you for your feedback
Feedback sent
We appreciate your effort and will try to fix the article