TABLE OF CONTENTS
2. Generate Test Scripts from Requirement Document
2.2 Requirement Document Format
3. Steps to Generate Test Scripts
3.1 Step 1: Navigate to Prompting
3.2 Step 2: Upload the Requirement Document
3.3 Step 3: Generate Test Cases
1. Overview
This article explains how to generate test scripts from a requirement document using algoQA.
2. Generate Test Scripts from Requirement Document
2.1 Prerequisites
Before generating test scripts, ensure the following are completed:
A project is created in algoQA.
The project is configured using either Offline Recorder or Online Recorder
UI elements are scraped and uploaded to algoQA.
The offline model is available in algoQA.
Refer to the following articles for detailed steps:
How To Launch Scraper Using algoQA
Learn how to launch algoScraper for the respective webpage and scrape UI elements while creating a project.Record a Scenario Using Online Recorder
Learn how to record a scenario using the Online Recorder.
2.2 Requirement Document Format
The requirement document must be created in either:
DOC/DOCX format
Excel format
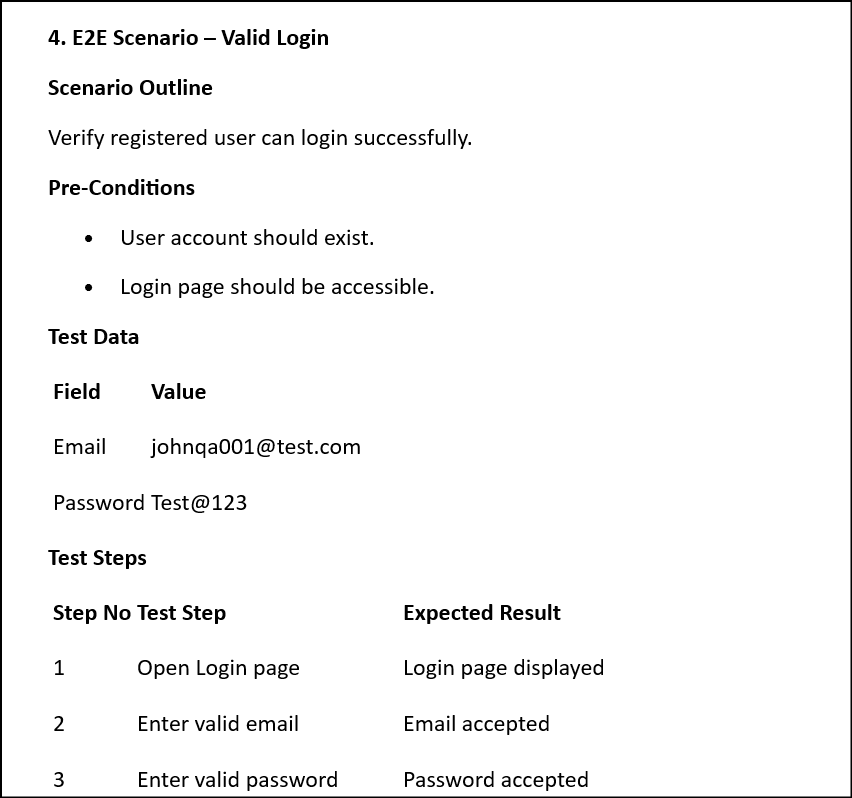
The document should contain one or more scenarios with the following details:
Scenario Name
Scenario Outline
Pre-Conditions
Test Data
URL
Test Steps
Expected Results
Note: The scenarios in the requirement document should match the data recorded using the Offline Recorder or Online Recorder. Better alignment between the requirement document and offline model improves the quality of generated scenarios.
3. Steps to Generate Test Scripts
3.1 Step 1: Navigate to Prompting
Open Test Design.
Click on Prompting.
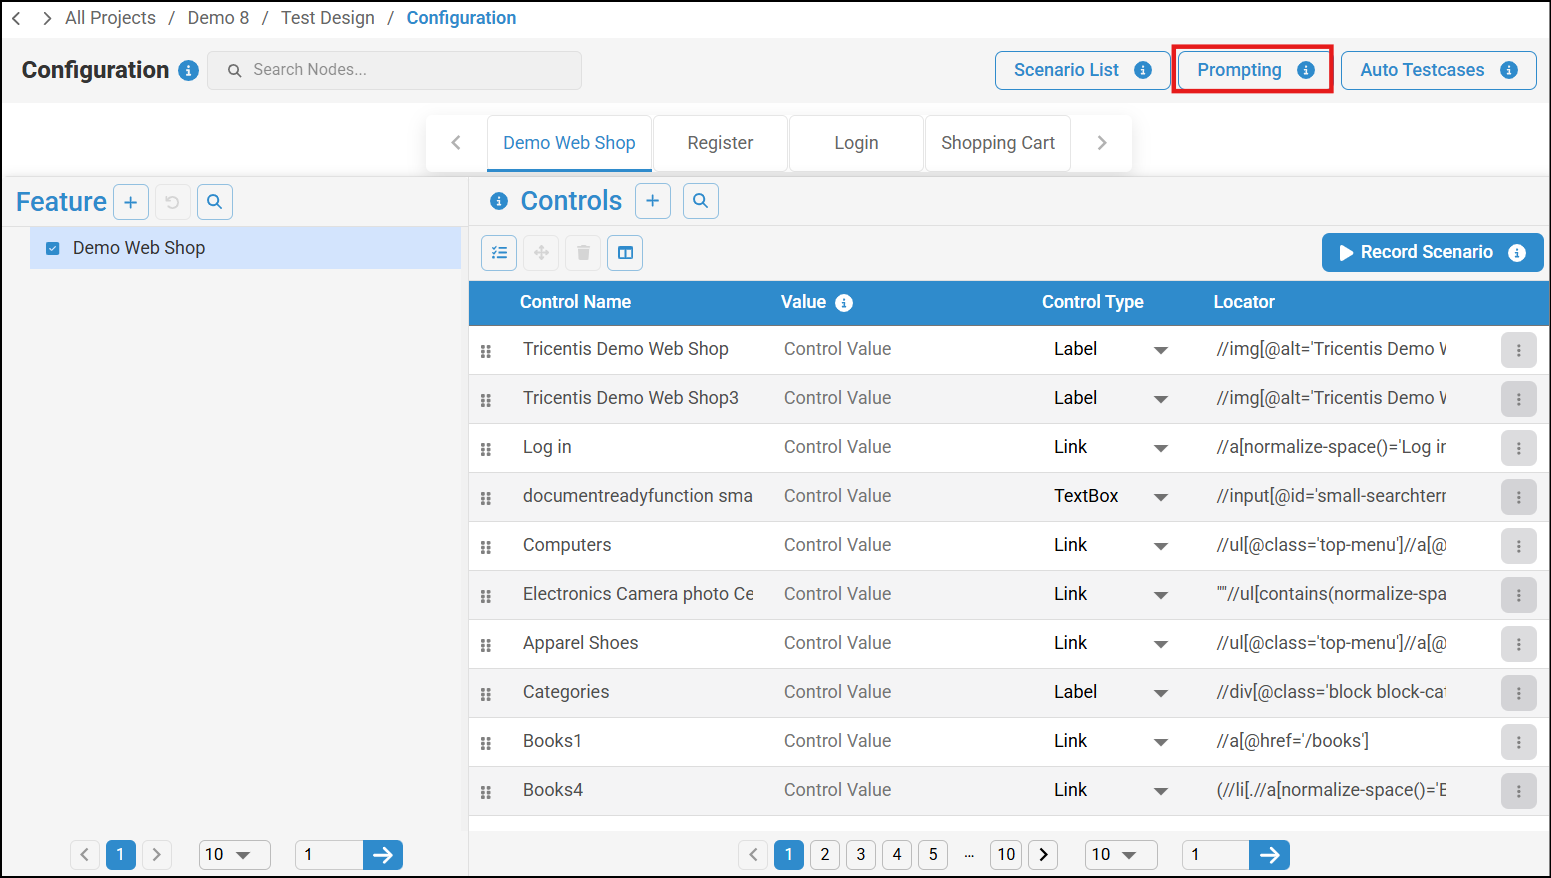
The Prompting UI will appear.
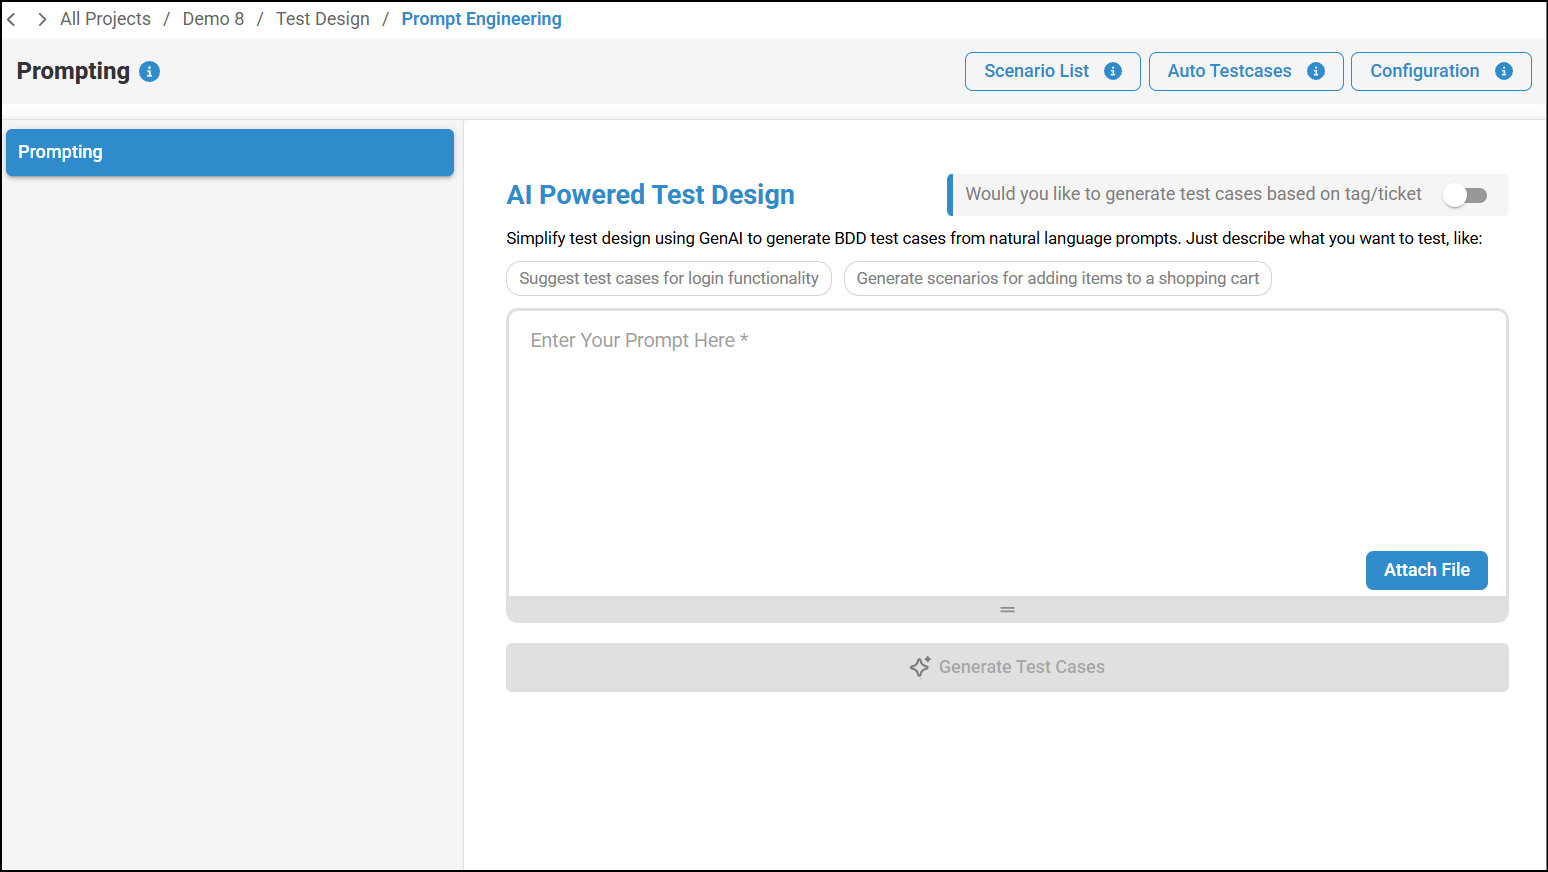
3.2 Step 2: Upload the Requirement Document
Click on the Attach File button.
Browse and select the requirement document.
Note:
Prompt input is not required while uploading the document.
The maximum supported file size is 3 MB.
The input is provided as text, but a reference configuration is mandatory.
The offline model is required for text-to-script conversion.
The offline model and requirement document should match for better scenario generation quality.
Note: File upload may take some time depending on the document size.
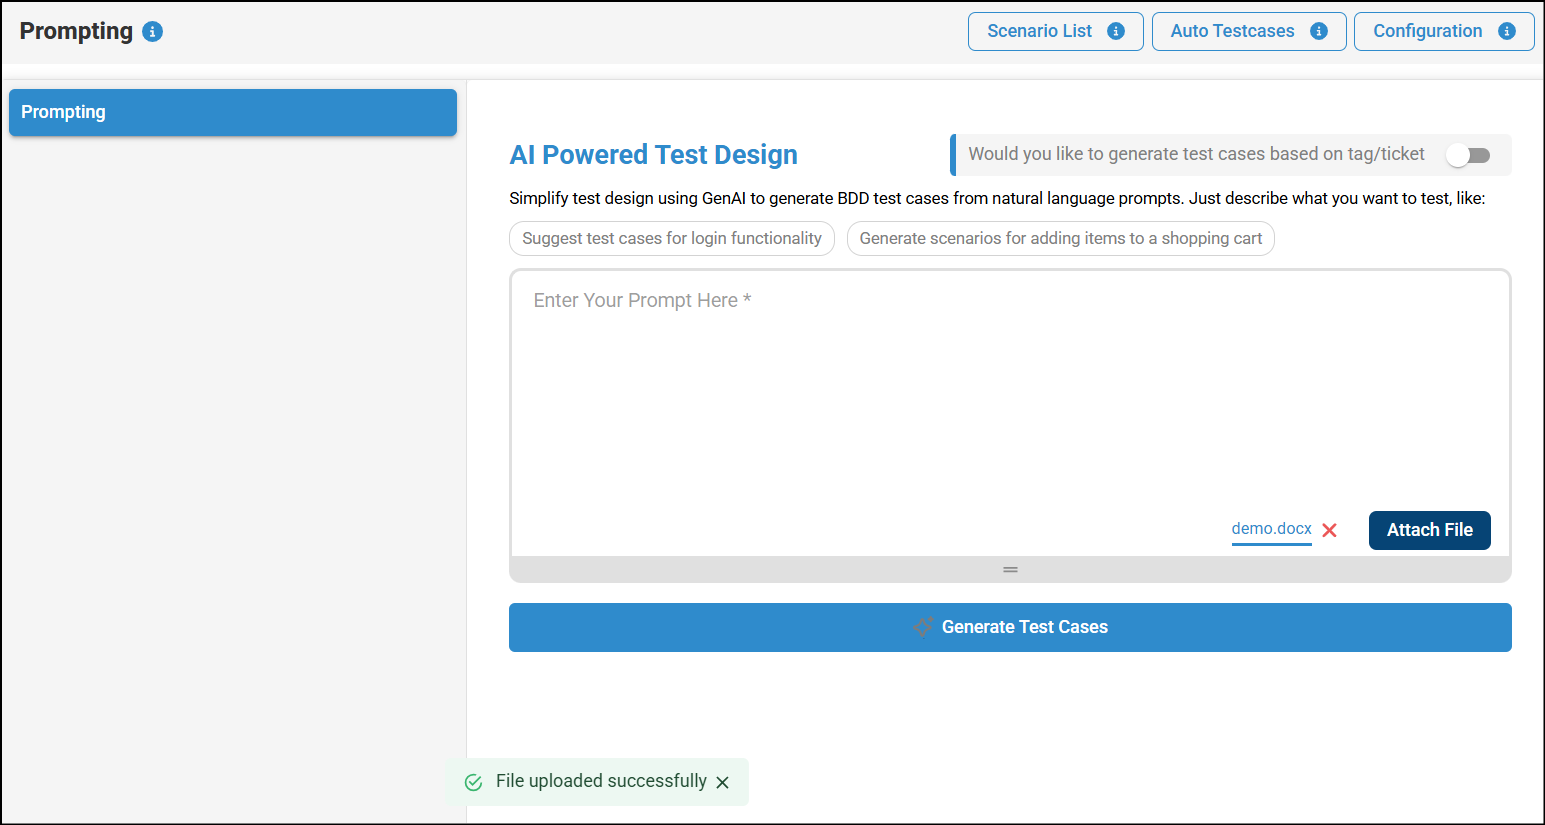
After the file is uploaded:
The prompt input field will be disabled.
Note: You can also attach images. The image should be in the form of a flow diagram. The text will be extracted from the image, and scenarios will be generated accordingly.
3.3 Step 3: Generate Test Cases
Click on Generate Test Cases after the upload is completed.
Scenario generation will start.
Note: Generation time depends on the file size and the number of scenarios.
Once generation is completed:
Scenarios will be generated with Scenario Name and Scenario Outline.
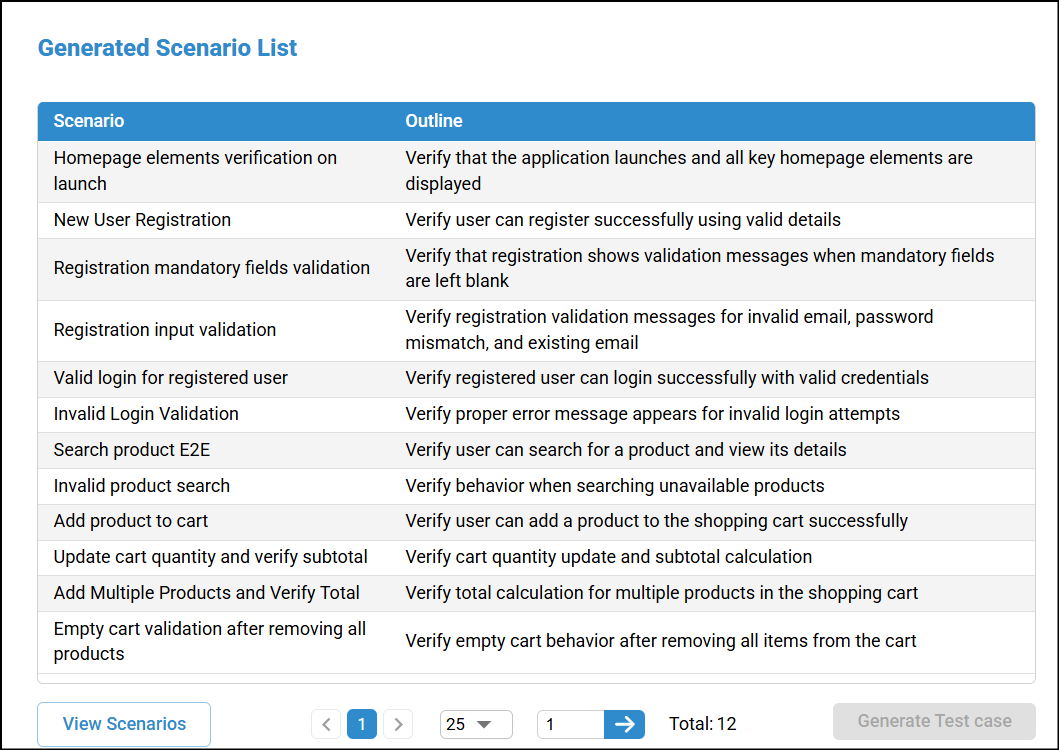
3.4 Final Step
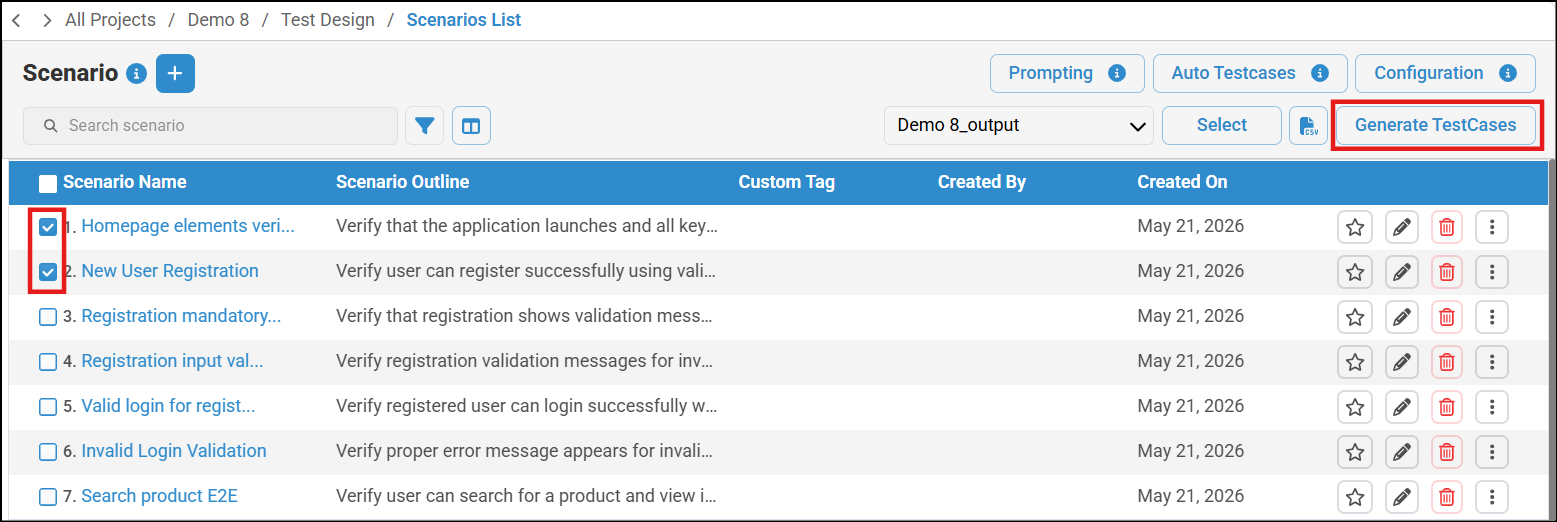
- Review the generated scenarios carefully by clicking on View Scenarios.
- Select the scenarios for which test case needs to be generated and click on Generate TestCase.
- After validation and necessary modifications, proceed to generate the test cases and test scripts. Refer Generate Test Cases and Test Scripts to know more about generating test cases and scripts.
4. Important Observations
If the number of generated scenarios is less than the number of scenarios in the requirement document, it may be because some scenarios are not available in the offline model.
In some cases, manual editing or refinement of scenarios may be required.
Was this article helpful?
That’s Great!
Thank you for your feedback
Sorry! We couldn't be helpful
Thank you for your feedback
Feedback sent
We appreciate your effort and will try to fix the article