TABLE OF CONTENTS
2. How to record a scenario using Record Scenario feature?
1. Overview
You can record your scenarios using Record Scenario feature and save the workflow or scenario. Scenario will be saved in the same sequence it has been recorded. To access Record Scenario click on node in canvas, you'll be directed to Test Design > Record Scenario.
2. How to record a scenario using Record Scenario feature?
You can scrape UI elements from a webpage by performing the actions below, download the scraped file, and upload it to a project where a node will be created.
Alternatively, you can directly add nodes from the canvas. By clicking on a node, you will be redirected to the Test Design screen, where you can add features and controls. To know more on how to create offline model check Create Offline Model
Note: You can also launch algoScraper directly from algoQA, To know more check How To Launch Scraper Using algoQA And Scrape the UI elements


To more about the features in Canvas check Canvas.
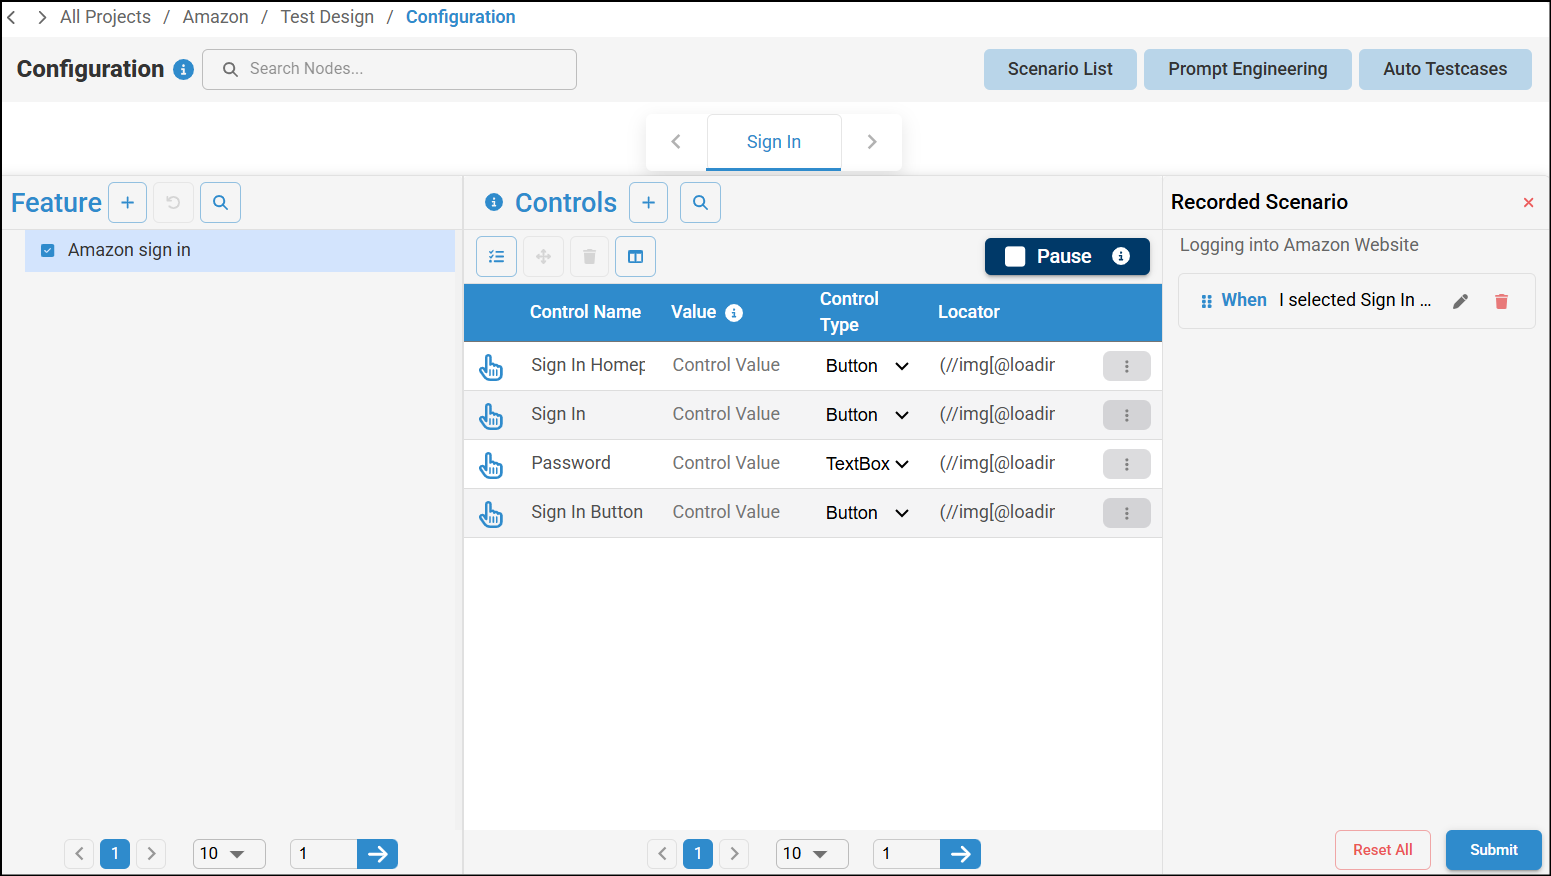
User actions
- Open Amazon.in website
- Click on Sign in.
- Enter the password.
- Click on Sign in button.
To record a scenario, perform the following:
- To access Record Scenario click on a node in canvas, you'll be directed to Test Design screen and click on Record Scenario.

- Select the required feature ( Amazon sign in ) and the Node (Sign In) to view all the added UI element details and then arrange all the UI elements in a sequence. For example, if you were performing a Login process, you will select the all the UI elements related to this process in a sequence, such as username, password and Sign in button. You can search for a particular UI element in the Search Control bar.
Note: When adding a new feature and more than one node already exists, feature names that are used in other nodes will appear as suggestions. You can select one if it is relevant.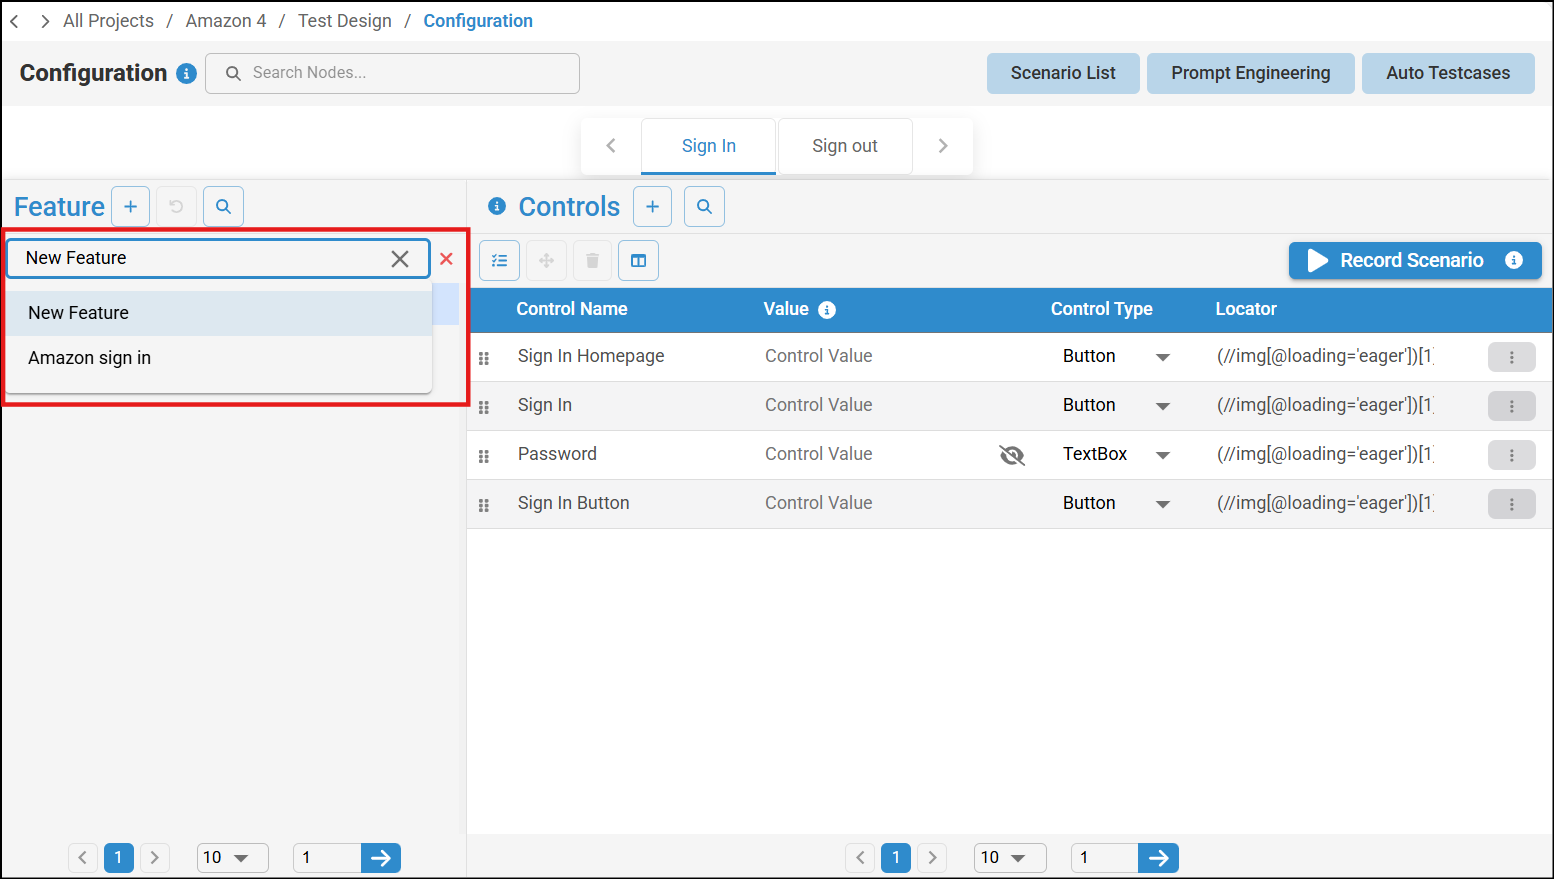
- Similarly, select all the associated UI elements to create a sequence.
In the Recorded Scenarios window, click Submit to save the recorded scenario. Once the scenario is successfully saved, you will see a 'Scenario created successfully' message. You can reset to the default settings by clicking the Reset button. Note: All sensitive data—such as OTPs, passwords (pwd), one-time passwords, security IDs, security keys, secret IDs, and secret keys—will be encrypted throughout the entire process. This includes during data recording via the scraper, after the scraped file is uploaded to algoQA, and during script generation.

- You can view the history of a scenario by clicking the Scenario History icon from the Scenario Steps List or Scenarios List. The history displays all actions performed, who performed them, and the date and time. You can use the search field to find specific logs, and apply filters by time (Today, One Week, Custom) and log type (All, Success, Info, Error). Click Apply to activate the selected filters.

Note: After selecting Select Steps, you can use Master Select to select all steps at once. However, deleting all steps is not allowed because at least one step is required in the scenario steps list, so the delete icon will be disabled. If you unselect one step and then click the delete icon, a confirmation pop-up will appear asking “Do you want to delete multiple scenario steps?”. Click OK to delete the selected steps at once.
If you choose to edit the recorded scenario, then click the edit icon besides the scenario name in scenario List screen. For more information, see Managing Test Cases using Edit Scenario Feature.
Note that you can select multiple UI elements repeatedly in a single workflow.
When entering a value in the custom value and Message fields, adhere to the following:
- Custom value and message fields cannot be just blank spaces. If you wish to include spaces, you can use the keyword _empty_. For more information, see Keywords used in algoQA. If you leave it blank (spaces without entering anything) in any of the fields, then a error message will be displayed saying you can't add only spaces.
- You can include spaces at the beginning, end, or between words.
Tip: If you wish to generate test cases using Auto Generate Test cases feature instead of Record Scenario feature, see Auto Generate Testcases Feature.
Was this article helpful?
That’s Great!
Thank you for your feedback
Sorry! We couldn't be helpful
Thank you for your feedback
Feedback sent
We appreciate your effort and will try to fix the article